As always, make sure you have the Mu editor and that your CPX BLE is running the latest stable version of CircuitPython. Today we’re going to do some more exploration of the onboard sensors of your device and seeing how it can send information to your computer- first over the USB cable (using a serial connection) and then using the Bluetooth protocol we first experimented with last week.
Plug in your Bluefruit, and navigate to the CIRCUITPY drive. Look inside, and in particular, at the lib folder. It likely has something like this going on:

Those, of course, were the libraries we downloaded and installed last week for our BLE game. We’ll be using most of the same libraries today but with one addition- adafruit_ble_adafruit (not the same as adafruit_ble!!).
(as a sidenote: if for some reason you don’t have the libraries listed above, please take a moment go go grab them from the course resources folder OR, if you are feeling like you want a challenge, you can follow the directions below that we are using to get adafruit_ble to get all of the needed libraries, which is the more advanced method.
Downloading a library
While last week I gave you a bundle of libraries already pre-selected to use (remember you downloaded an archived or zipped file?), today we’ll go through the steps of how to locate and install a library on your own. This is, in my experience, the biggest stumbling block for students who are learning CircuitPython for microcontrollers.
You will encounter lots of libraries over the term, and more often than not I’ll give you a link to a zip file of libraries to download and install. Adafruit does the same. In those cases, I or the other authors of projects have done some of the work for you, which makes it faster to get your project running but have major downsides, the biggest of which is that you are not getting the latest version of a library – you are getting whatever version was up when I, or the author, grabbed it to bundle it for you.
The instructions that follow show you how to locate a library from the central database and install it on your own, and thus are more general and widely-applicable than project-specific ones. But, be very precise: you must follow these instructions exactly or it will not work – don’t rename anything, don’t put things in the wrong folder, and don’t copy more than you are asked to. There are no shortcuts here.
Navigate to the CircuitPython.org library page. This is a huge list of .zip files of libraries. Locate and click the button to download the one labeled Bundle for Version 9.x. As of this writing, it’s the second purple button down the page:

The actual file you download will have a name that starts with adafruit-circuitpython-bundle, but the information after that will be different because these libraries are updated with every new version of CircuitPython AND often rebundled every day or so. In the screenshot above, you can see that it ends with a string of numbers that tells you the date – 2025-02-06, meaning these were the libraries released as of Feb 6 2025. Your file will have a different date because you, my friend, are living in my future (cool, btw, how is it going?).
Go to your downloads folder and unzip the file you just downloaded. On most operating systems, this just means open it. You’ll now have something like this:
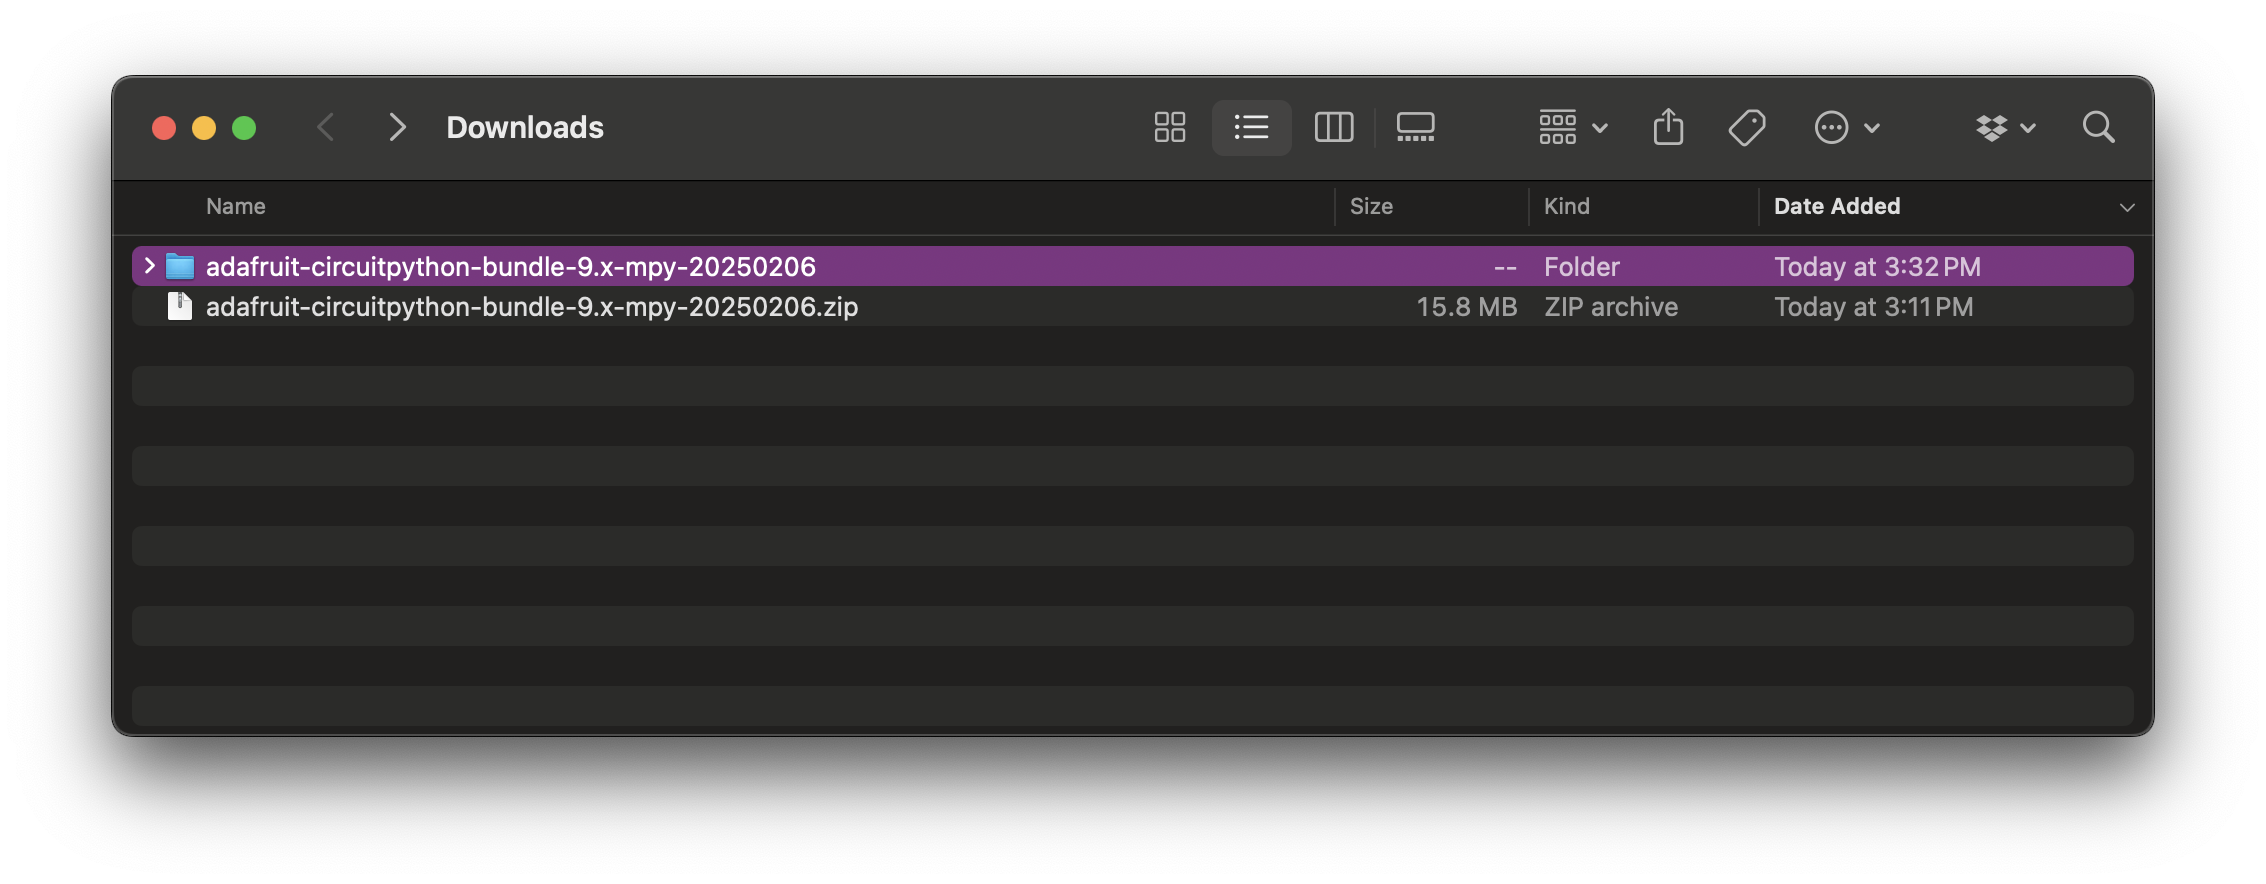
Again, the string of numbers at the end of your file will be different!
Open up the folder you just unzipped and you’ll see this:

Now, open up that lib file to see this:

What you have here is hundreds of files and folders, almost all of which are or contain .mpy files. These are modified python files- they are compressed to take up less space because your microcontroller is a tiny little thing. But even when compressed, as a whole they take up a lot of space, so we never install all of them. We only install the bare bones of what we need.
It’s important and bears repeating: do not ever, under any circumstances, copy all of these libraries onto your microccontroller.
Scroll through that list of files (helps to sort it alphabetically) until you locate a folder called adafruit_ble_adafruit:
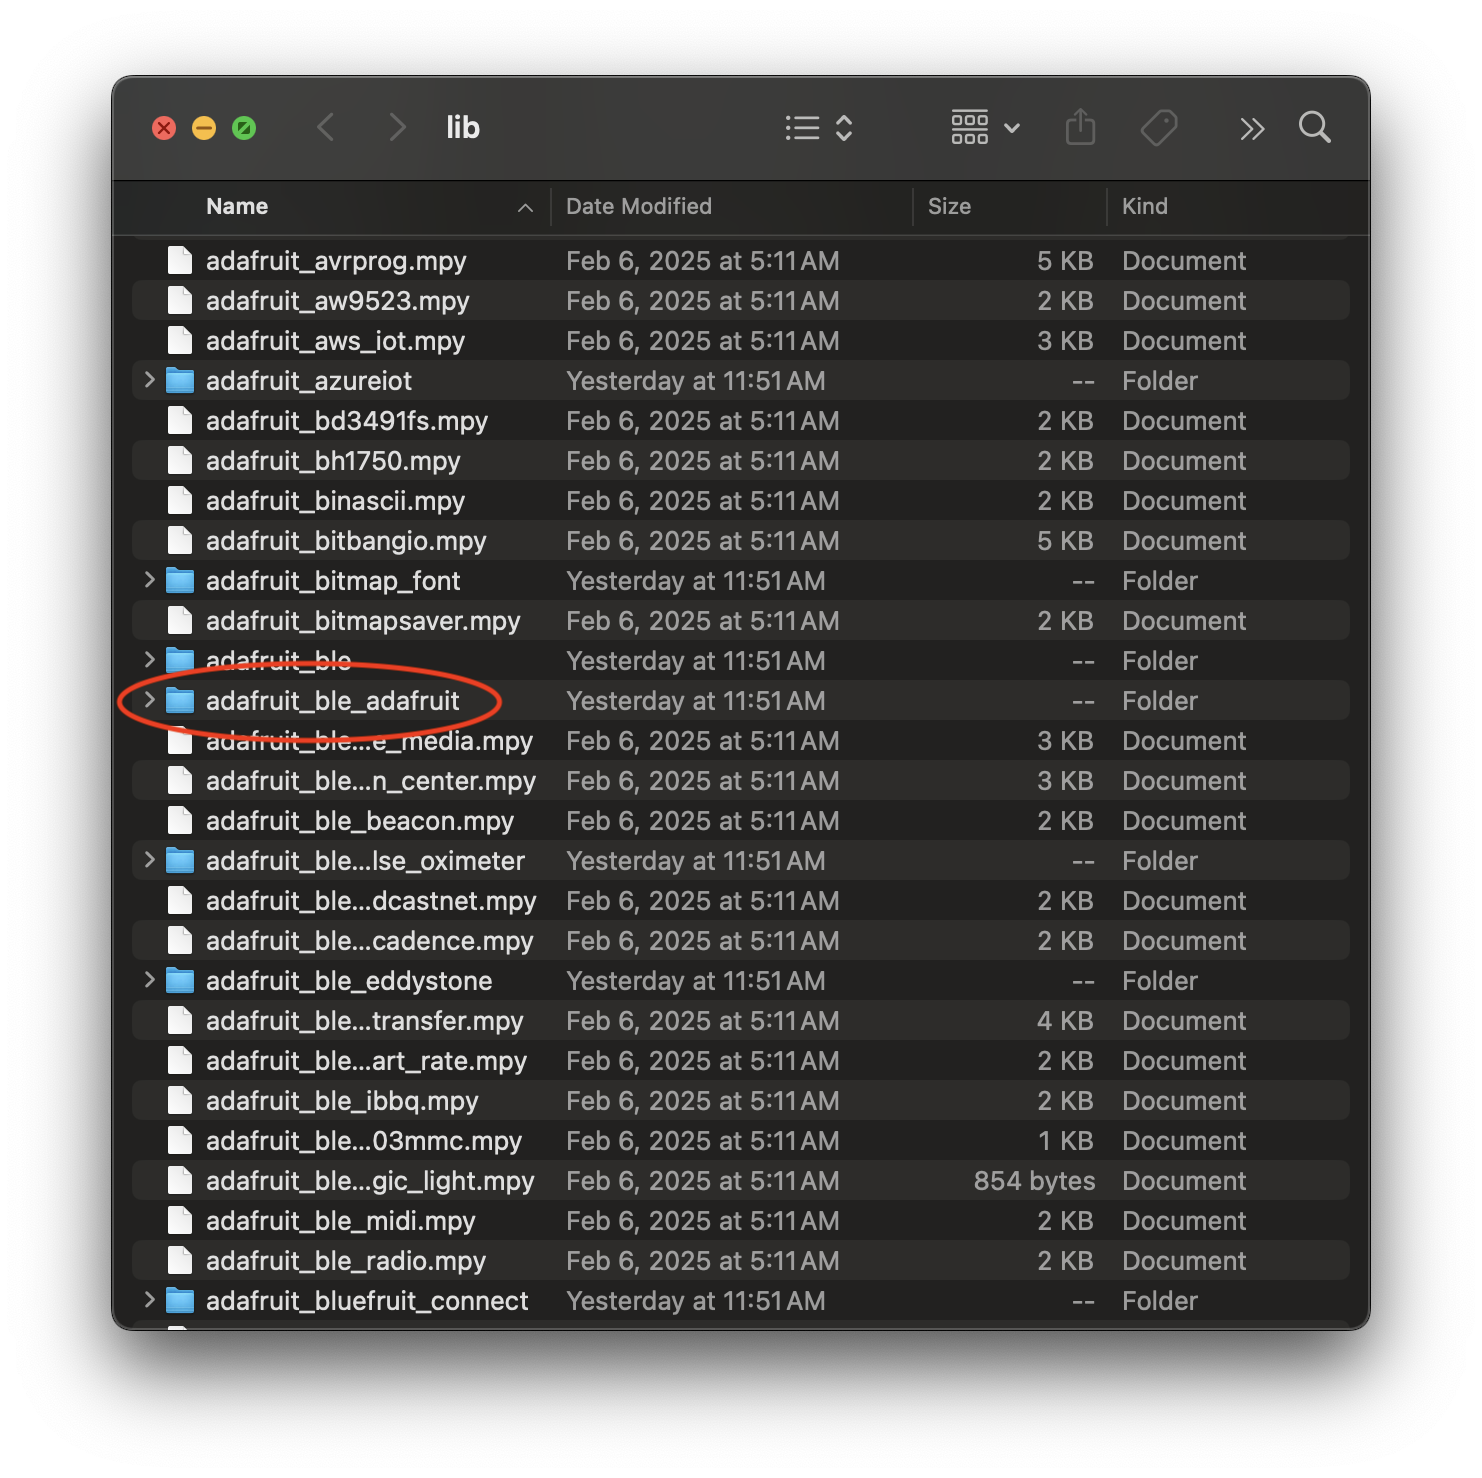
This contains a whole bundle of libraries, each one its own .mpy file. We need the whole system, so grab that and drag it over to your CIRCUITPY drive and put it in the lib folder there. You want to make sure it is contained inside that lib folder, not just on the drive, so THIS:

NOT THIS:

And you’re done!
If you know you’ll need more libraries later (and for our class, you will), you can keep the whole download of libraries from CircuitPython.org right were it is, on your laptop. Or, and this is what I recommend: you can delete it once you have copied the ones you need, because the next time you want a library you probably are going to want to get the newest one.
Coding With Sensors
For this next section, we are going to use Adafruit’s CPX library to access the sensors on our Bluefruit microcontrollers (you can see this library in your lib folder on the CIRCUITPY, it’s a folder called adafruit_circuitplayground). This is a library that Adafruit, the manufacturers of the CPX and Bluefruit, designed to simplify access to everything on these boards. Get yourself into the Mu editor and open up code.py, then delete anything that is there so you are starting clean. Now we need to import our library, and we’re actually only going to import one part of it, so start your references section with this line of code:
from adafruit_circuitplayground import cpThen add the time library, because even if Einstein says time isn’t a constant, it’s always with us:
from adafruit_circuitplayground import cp
import time
Now we have access to all of the functions in the cp subsection of the CPX library, along with the ability to pace them. Let’s start with a light sensor. Skip over your setup section of code, because everything is already set up for you by the library you imported, and type this in your loop section:
while True:
    cp.light
    time.sleep(0.25)
And click save. Your Bluefruit will flash but then… nothing will happen. You’ve put in code that is taking the light value from the light sensor (cp.light) every 1/4 second (time.sleep(0.25)) but you’re not doing anything with it, so that information is just sitting there on the board. We need it to report it out to us so we can at least take a peak. For this, we’ll start with printing the value to the console, which, in our case, is something we can see using serial. Change your loop section to this:
while True:
    print("Light Level:", cp.light)
    time.sleep(0.2)
Now, open up the serial console and click save to run the new code. You should have a stream of numbers that tells you the light level. Try changing the light level (put your hand over it or shine your phone flashlight on it) and you’ll see the numbers jump around.
(as an aside: the CPX library actually builds in some math to this function, so what you are seeing isn’t raw data from the light sensor, but modified data made to be easier to use. Normally the light level of the CPX ranges from 0-50k or so, which give us very precise information, but is just too big of a range for most of our uses, so Adafruit has modified it. If you want to see something closer to the real data, you can set up the light sensor as an analog input and peek at it that way.)
The Mu editor also has a built-in plotter, which can take in a pair of values and plot them on a graph. This function is part of the print function we just used, but it takes a slightly different form of information, as it needs something called a tuple, or a variable with multiple items in it. We can add another line to print to the plotter, and we’re sort of tricking it because we just put a comma but then don’t add a second value:
while True:
    print("Light Level:", cp.light)
    print((cp.light,))
    time.sleep(0.2)
Now, click plotter on your Mu editor and you can see the values plotted on a graph! If it is moving too quickly, raise the number in time.sleep, and if it is too low, lower that number.
Let’s play with some more sensors so you can see the values that the Bluefruit is giving you. You’ve got a sound sensor at cp.sound_sensor and a temperature sensor at cp.temperature. Add those, using the same format as before, and you might want to delay a little longer so you can see the values:
while True:
    print("Light Level:", cp.light)
    print("Temperature:", cp.temperature, "°C")
    print("Sound Level:", cp.sound_level)
    time.sleep(0.5)
Click save and see the values go by. You can throw these all in the plotter too. See if you can figure out how to do it based on the two different pieces of code above. Bonus fun: you can try to print all three at the same time:
print((cp.light, cp.temperature, cp.sound_level))The adafruit_circuitplayground library has a lot of different things it can do – for a full rundown, you can see their guide. For right now, as a challenge, see if you can set it up so that it will print the temperature when you push one button and print the light level when you push another. Scroll down for the answer.
Here’s one way you could do that, using colors for bonus fun:
from adafruit_circuitplayground import cp
import time

while True:
    if cp.button_a:
        cp.pixels.fill((0, 0, 0))
        print("Light:", cp.light)
        time.sleep(.25)
    elif cp.button_b:
        cp.pixels.fill((0, 100, 100))
        print("Temp:", cp.temperature, "°C")
        time.sleep(.25)
    else:
        cp.pixels.fill((255, 0, 100))
There is one sensor left we haven’t played with yet- the accelerometer. This is an onboard sensor that measures movement in three directions and thus gives the Bluefruit a sense of its movement through three dimentional space. I left this sensor for last because it actually can do a bunch of things. Two are additional inputs, or ways the Bluefruit can take information. These are cp.shake() and cp.tapped. They work the same way as the buttons, so take those two and sub them into your code for button A and button B (remember to keep the parentheses on shake!). You’ll get something like this:
from adafruit_circuitplayground import cp
import time

while True:
    if cp.shake():
        cp.pixels.fill((0, 0, 0))
        print("Light:", cp.light)
        time.sleep(.25)
    elif cp.tapped:
        cp.pixels.fill((0, 100, 100))
        print("Temp:", cp.temperature, "°C")
        time.sleep(.25)
    else:
        cp.pixels.fill((255, 0, 100))
Tap the device (use your finger to tap it right in the middle) or shake it to get a change.
Viewing the “raw” values from the accelerometer is also a bit more complicated than the others (remember no data is raw, and this is particularly true for this data). To do it, we need to set variables called x, y, and z (for our three dimensions) and map those onto the three values coming out of the accelerometer function, like this:
x, y, z = cp.acceleration(This works because of Python standards, by the way.)
Then add a print line and, for a bonus, because its already got more than one value, it will print to the plotter:
print((x, y, z))Open up your plotter to see the values. If you added this to the code you already had, it might look like this:
from adafruit_circuitplayground import cp
import time

while True:
    if cp.shake():
        cp.pixels.fill((0, 0, 0))
        print("Light:", cp.light)
        time.sleep(.25)
    elif cp.tapped:
        cp.pixels.fill((0, 100, 100))
        print("Temp:", cp.temperature, "°C")
        time.sleep(.25)
    else:
        cp.pixels.fill((255, 0, 100))
        x, y, z = cp.acceleration
        print((x, y, z))
Tilt the Bluefruit to see the lines move.
Bluetooth Chrome Dashboard
Up until now, we’ve been using serial over usb to get the data from our Bluefruit sensors. But it is a bluetooth device, so now we’re going to learn how to use an Adafruit creation, the Chrome Bluetooth Dashboard. Note that this requires using the Chrome browser. Delete all of your code from earlier and cut and paste the code from Adafruit.
We need to modify one line in the code before we are ready to go. This code will set up your board to advertise itself as a Bluetooth device so that your browser can connect to it. However, there are a bunch of you in close proximity, so you want to make sure you can identify your specific board in the sea of boards. To do that, go down to line #55, which says this:
ble.name = "CPlay"This is the line that sets the advertised name of your board. You can tell because right above it, it has a little human-readable comment explaining how these boards advertise themselves. Replace the word CPlay in that line with a unique name made up of letters and numbers (special characters usually cause issue). Make sure to keep the quotation marks around it! So for example, I might use:
ble.name = "CydsBluefruit"And click Save to run it.
The next bit is just to get your browser set up to receive the information. I’m going to send you over to Adafruit to finish it off: go now!.
If you DO NOT have Chrome, or if you have done that and are ready for the next challenge, you can try connecting the Bluefruit to your phone.
