Today we are going to combine two basic techniques: a simple electric circuit and a block-style quilt. First, make sure your team has what you need: four squares of cardstock (one orange, the others any colors you wish), a battery, a battery holder, a plastic bag of LEDs, a roll of invisible tape, rolls of copper tape, and a pair of scissors.

A basic circuit works by creating a path for electricity to flow from one side of a battery to another. You will work with your team to create a four-square complete circuit, then we will work together as a class to make a large quilt of these squares.
A note on materials:
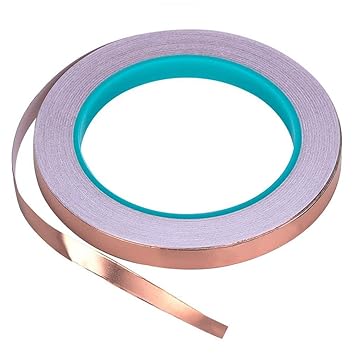
We are going to use copper tape as a conductor. Note that while the copper tape has a conductive adhesive, the top (non-sticky) surface is a far better conductor – so we are going to make sure that everything touches that side of it.
We are using coin-style lithium batteries. Note which side is positive and which is negative (the shiny side has a plus on it!)

Finally, the batteries will be powering little light emitting diodes, or LEDs. LEDs can only use electricity one way. Each LED has a long and a short leg to indicate which way it should be connected. The long leg is the positive side, the short is the negative (or ground).Your bag should have ten red/yellow or blue/green LEDS. (Note that due to voltage differences, you cannot mix these two kinds on the same circuit!) Your bag should only have two colors.
Now let’s get started!
Take your square of cardstock and note that it is marked with guidelines on two edges. These tell you where to connect the power and ground lines (or positive and negative). Your first step is to build your section of the circuit by “drawing” two parallel lines of copper tape across your square using these markers as guides.
You can make your own section as short:

Or as long as you wish:

As long as you keep the lines parallel!
That means:THE LINES CANNOT CROSS each other

Or themselves!

And they cannot drift too far apart!

You might want to draw lines to guide you:

Then, take the copper tape and fold one edge over:


Then carefully press the tape along the first line. Be careful not to break the tape, and when turning a corner, use lots of extra. When you reach the opposite side fold the end over the edge just like you did at the start.
Do the same for the second line, making sure that the lines don’t stray too far apart.
Now, just to make sure, you should have four bits of tape poking over on the back, like this:

If you forgot to do this, thats okay, you can add them, just overlap the tape.

Now it is time to get some power. Your team has one special battery card- it is orange and has only one set of guide markers instead of two. Attach the battery pack to the orange card using the same idea- making sure that the edges of the wire hang over the edge of the paper, and that they do not cross:


The next step is to join the squares together.
Note that each square edge, where you had guides, has little signs indicating whether the line is a positive or a negative line. Use these guides to line up the four squares together – positive to positive, negative to negative. Take special care to orient the orange (battery) square correctly!. Your wires should make a long curl with the battery at one end.

In order to maximize the contact between the pieces of copper tape, you must overlap the squares at each joining edge. Each square has a small notch on the corner to help you guide it into place. This is a bit tricky to explain, so here is a video.
Once the four squares are laid out, use extra copper tape to reinforce the overlaps: You might find this particularly useful if there are edges where the copper tape doesn’t line up exactly perfectly.

.Now reinforce each edge with a few pieces of plain scotch tape. You should put at least one right over the copper tape at the join.

Now it is time to turn on the lights!
Start by PUTTING IN THE BATTERY! This is important. You can’t do anything without juice. The plus side (shiny side) should face down. Slide the battery in flat to the back of the holder- underneath the little tongue flap:

Note on the battery case that there are little markers- + and -. These indicate which of the copper lines is positive and which is negative. Note which is which. If you have done this correctly, your copper tape should be in a big curve and the positive line should be the outermost edge of that curve.
Each of you can now work on your own square again. Grab one of the LEDs from your group’s bag. Remember, your whole group has to use either red/yellow or blue/green. You cannot mix! If you try the lights wont work:
Alright, anyway- take a look at your LED and note which is the positive (long) and which the negative (short) leg.
Open up the legs of the LED into a split, keeping track of which is which. Push the LED so it lays flat on the paper and stands up on its own:

Now put the LED at any place over your two copper tape lines, making sure that the positive leg is on the positive (“outside”) line and the negative leg on the negative (“inside”) line

Push it down firmly, and it should light right up! If it doesn’t, check that your connections are all good. If none of your group can get the LEDs to light up, check that your battery is inserted correctly (positive side down!). If that doesn’t work, raise your hand so Cyd can come help you.
Once you have the lights going, tape the two legs down with invisible tape.
You can add more LEDs to your square. Your team can use a maximum of 10, so confer about how you want to distribute them.
Tada! You have finished your square!
If you are done early, you can now decorate your squares. You can draw on them, cut and tape extra squares of color, or even, if you dare, add extra copper tape (as long as it doesn’t touch the live wires!!)
One possibility is to create flowers with the LEDs. Grab some cardstock and poke a hole in it, just about the side of the tip of a ballpoint pen:

Cut out a circle around the square (my circle is very messy, I am sure yours will be much nicer), then press it down over one of your LEDs:

Now you can take that circle off and cut and paste petals all around it:

Let your imagination run wild!
