Gemma + Piezo Buzzer!
Today, we’re going to continue the fun of interactive microcontrollers by adding a piezo buzzer to your GEMMA. As always, before we start you want to go ahead and update CircuitPython to the latest version.
Grab your sewed circut, LED, and the piezo buzzer – a little black plastic disk with red and black trailing wires. Piezos contain little disks that deform in predictable ways when we apply electricity to them, so we use that knowledge to make them vibrate at frequencies that produce musical tones. There are a two different kinds of buzzers- it’s an aesthetic difference. The photo has both for reference but you’ll only have one.
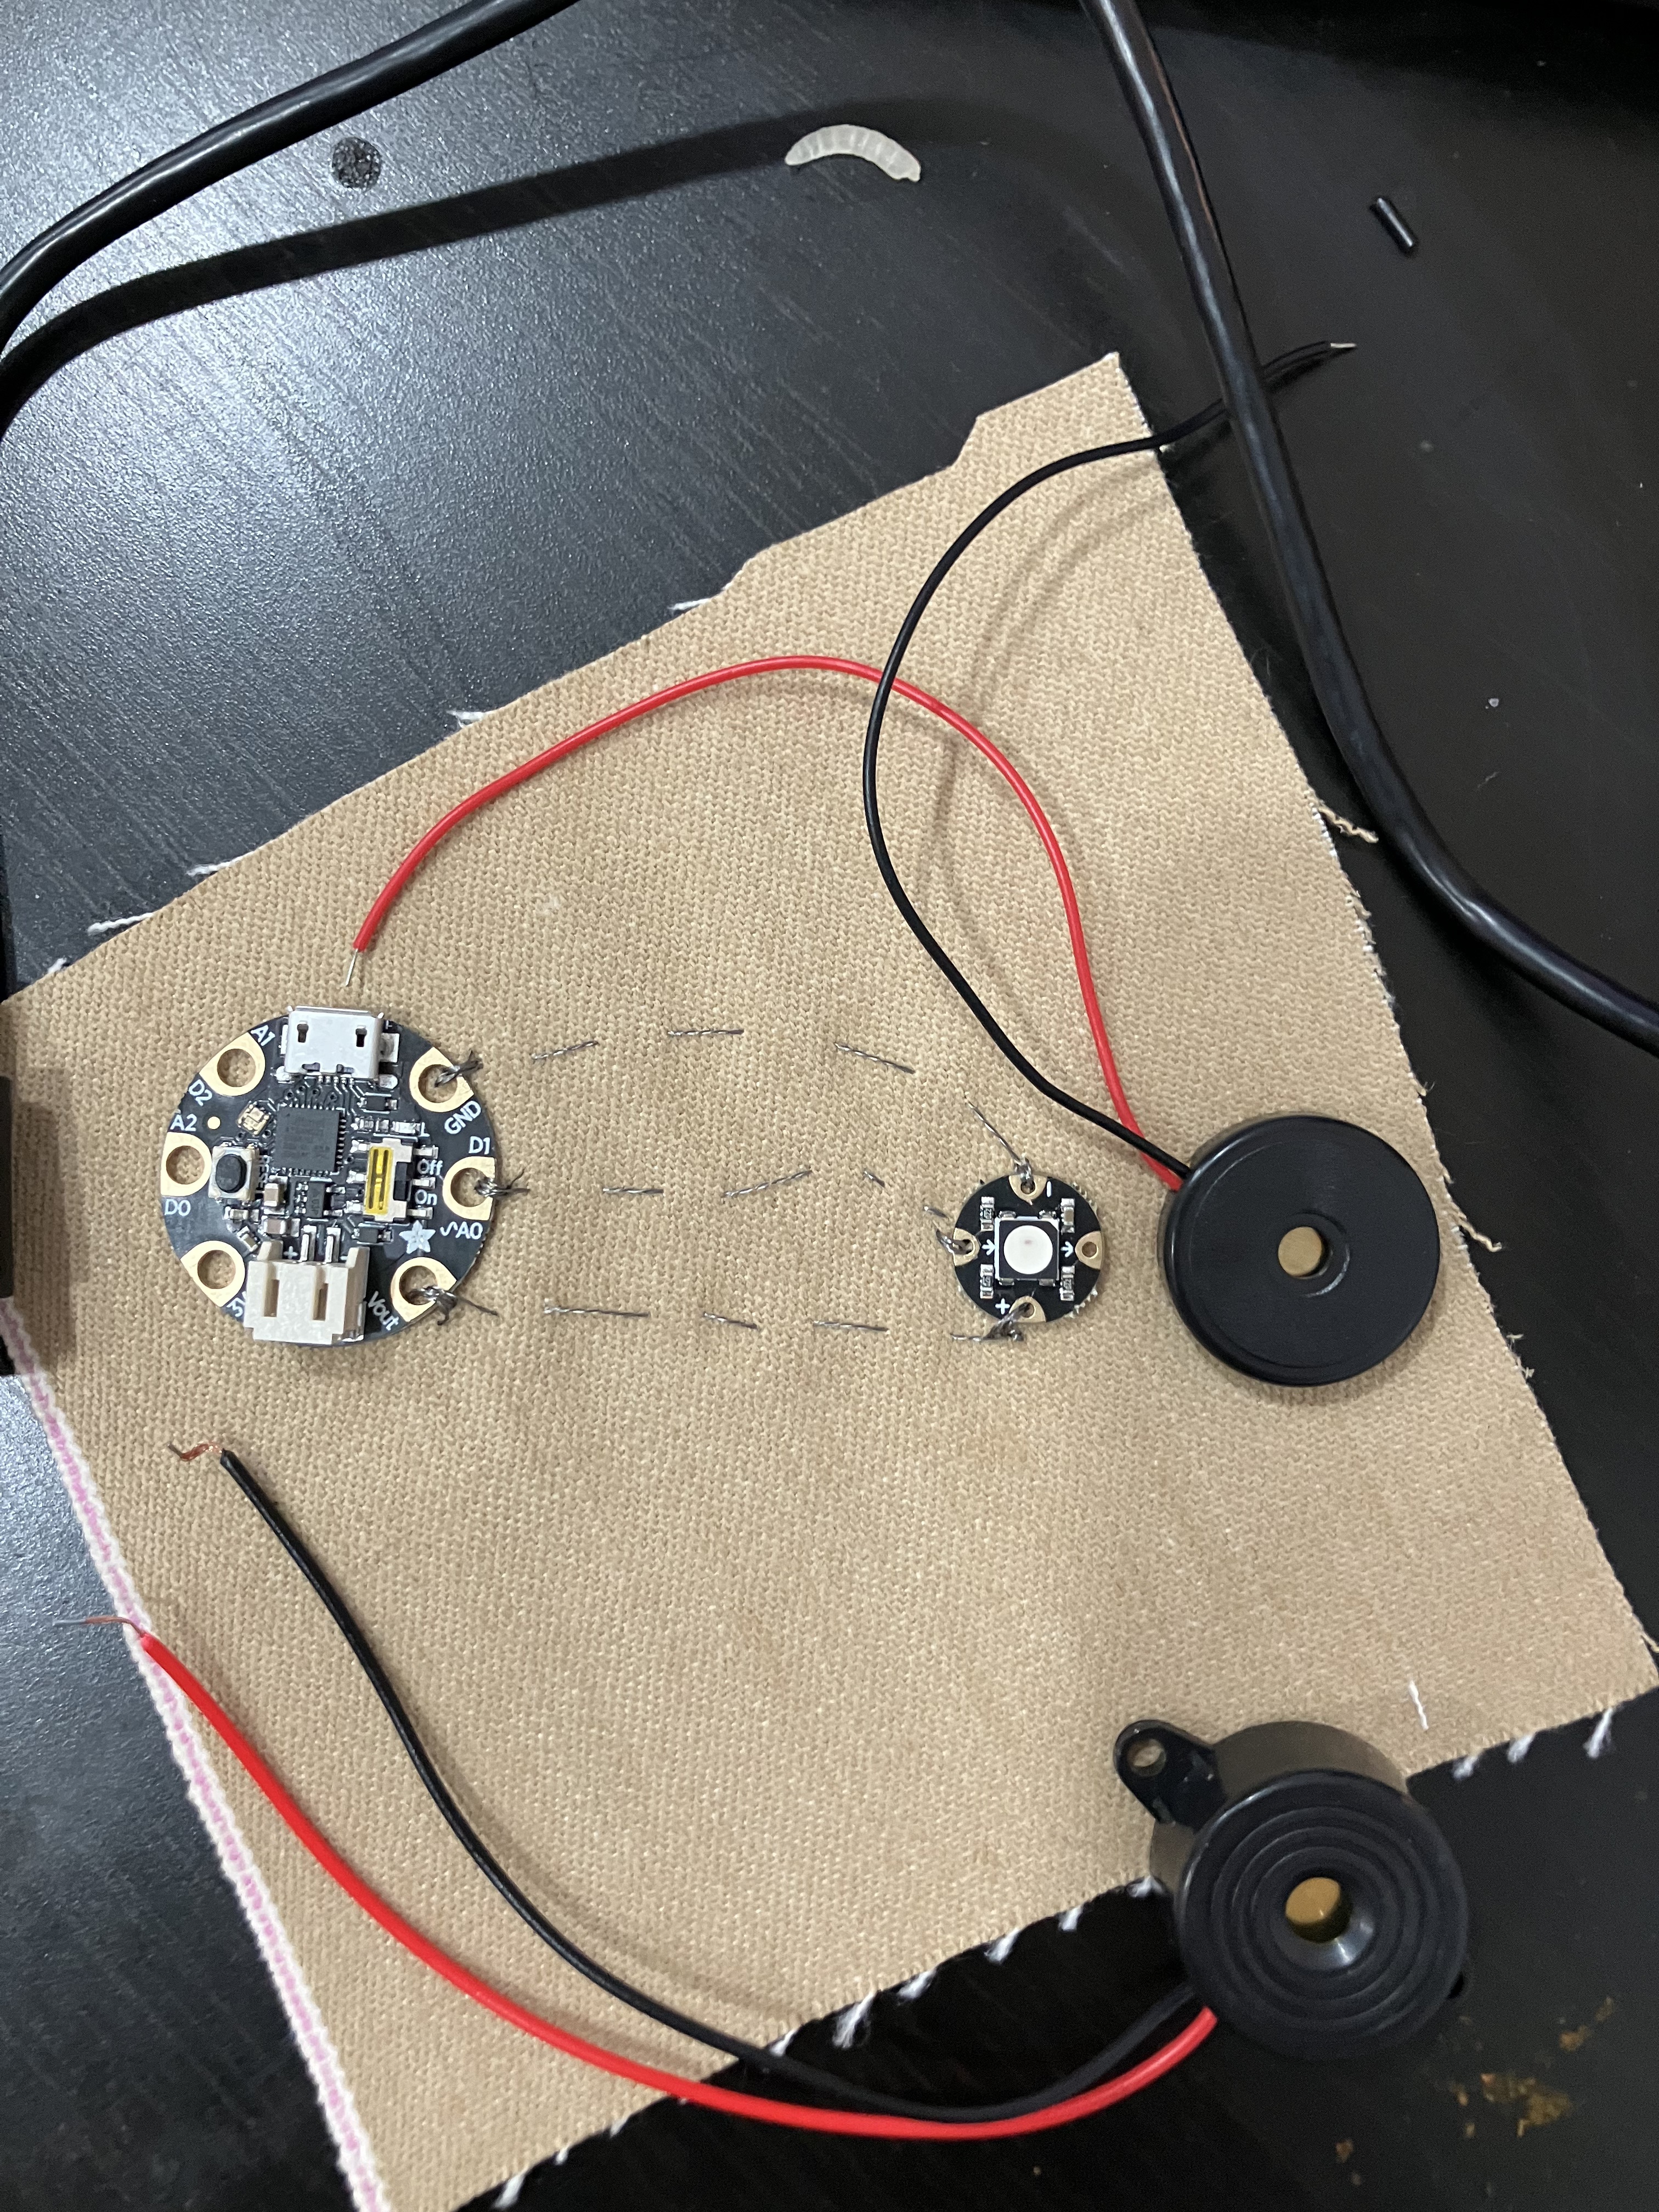
The wiring for this fun little guy is pretty simple – it just takes power and ground. But if there is no data pin, how do we vary the information? Good question. Instead of wiring it directly to a power pad, we’re going to send voltage to it over one of our good old I/O pins – our friend A2. So hook the red wire to A2 and the black to GND. You can use alligator clips or you can just bend the wire around the pad:

The wires are insulated, so unlike our sewn circuit thread, we don’t need to worry about them touching.
Open up the Mu editor, plug in your GEMMA, and make sure your code.py file is loaded. It probably has last week’s code in it. Delete ALL of it and replace it with this:
import time
import board
import pwmio

piezo = pwmio.PWMOut(board.A2, duty_cycle=0, frequency=440, variable_frequency=True)

while True:
    for f in (262, 294, 330, 349, 392, 440, 494, 523):
        piezo.frequency = f
        piezo.duty_cycle = 65535 // 2  # On 50%
        time.sleep(0.25)  # On for 1/4 second
        piezo.duty_cycle = 0  # Off
        time.sleep(0.05)  # Pause between notes
    time.sleep(0.5)
And now, press SAVE! Cacophony!!
(Remember your GEMMA has an on/off switch if you want to make it stop)
What’s going on here? Let’s take it one section at a time.
In our references, we’ve called a new library: pwmio. This is the pulse width modulation input/output library, allowing us to control devices that can vibrate at specific frequencies.
In the setup section, we create the piezo using a function from this library. Note in there we specify what pin it is on with board.A2.
Then in the loop, we have… something entirely new. Some of it should be familiar- our friend time.sleep is in there telling us to pause, for one. For two, piezo.frequency and piezo.duty_cycle are similar in syntax to our friend pixels.show, and do, in fact, do a similar thing: they tells the object piezo (which we defined earlier in setup) to vibrate at a specific frequency for a particular cycle. But the whole thing is wrapped in a new syntax – a for loop.
For is a way of going through a list of items without having to repeat the code. REmember last week we had a whole string of code that repeated itself but with different colors? Well, instead of that, we could just say to the GEMMA – here is a list of colors, and here are the instructions for how to change the light to each color- just go through the list one at at time.
This for loop has the piezo buzzer buzz at a frequency (called f), and it just iterates (repeats) over a list of values for f. Specifically, it says:
for f in (262, 294, 330, 349, 392, 440, 494, 523)Each of those numbers is a frequency, and they actually represent half/whole tones for a standard musical scale. So when the loop runs, it buzzes at 262 for .25 seconds, pauses, then buzzes at 292 for .25 seconds, then pauses- and on to the end. Then it loops back to the beginning!
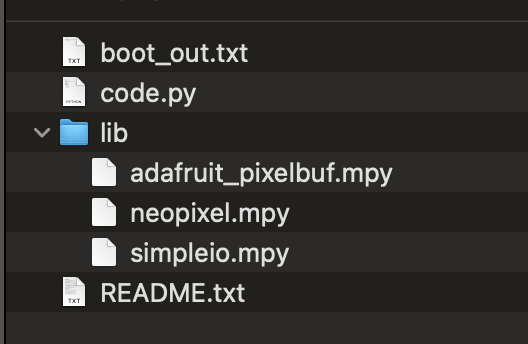
Now, we actually will rarely use the straight PWM values for a buzzer. Piezo tones are so common that CircuitPython has an even simpler library for using them- its called simpleio. But it doesn’t actually come standard on the GEMMA, so we’re going to install it ourselves. Go to the class resources folder and download the file named simpleio.mpy. You need to drag and drop that on your CIRCUITPY drive, in the lib folder. Note you’ve already got some libraries in there- that’s the neopixel libraries we used before! It will now look like this:
Here’s the same program but using the simpler code. Clear your code.py, and cut and paste this in:
import time
import board
import simpleio

while True:
    for f in (262, 294, 330, 349, 392, 440, 494, 523):
        simpleio.tone(board.A2, f, 0.25)  # on for 1/4 second
        time.sleep(0.05)  # pause between notes
    time.sleep(0.5)
Tada! Same song, different cycles. Use that on/off switch please.
You can change the list of tones if you wanted to play a melody. These are a scale, in C major, like so:
- 262, # C4
- 294, # D4
- 330, # E4
- 349, # F4
- 392, # G4
- 440, # A4
- 494, # B4
Here’s Twinkle Twinkle Little Star:
import time
import board
import simpleio

while True:
    for f in (262, 262, 392, 392, 440, 440, 392,
                349, 349, 330, 330, 294, 294, 262,
                392, 392, 349, 349, 330, 330, 294,
                392, 392, 349, 349, 330, 330, 294,
                262, 262, 392, 392, 440, 440, 392,
                349, 349, 330, 330, 294, 294, 262):
        simpleio.tone(board.A2, f, 0.4)  # on for 1/4 second
        time.sleep(0.05)  # pause between notes
    time.sleep(0.5)
Let’s pull in the code from last week and really make a twinkle star, eh?
import time
import board
import simpleio
import neopixel

pixels = neopixel.NeoPixel(board.A0, 1, brightness=0.3)

while True:
    for f in (262, 262, 392, 392, 440, 440, 392,
                349, 349, 330, 330, 294, 294, 262,
                392, 392, 349, 349, 330, 330, 294,
                392, 392, 349, 349, 330, 330, 294,
                262, 262, 392, 392, 440, 440, 392,
                349, 349, 330, 330, 294, 294, 262):
        pixels.fill((150, 150, 255))
        simpleio.tone(board.A2, f, 0.4)  # on for 1/4 second
        pixels.fill((0, 0, 0))
        time.sleep(0.05)  # pause between notes
    time.sleep(0.5)
Why does this work? Well, I’m piggybacking on the buzzer code, which already has the rhythm (.4 sec on, a tiny bit off) built in, and adding in a note to the light!
Here’s another fun variation, where we use math to change the color with the tone:
import time
import board
import simpleio
import neopixel

pixels = neopixel.NeoPixel(board.A0, 1, brightness=0.3)

while True:
    for f in (262, 262, 392, 392, 440, 440, 392,
                349, 349, 330, 330, 294, 294, 262,
                392, 392, 349, 349, 330, 330, 294,
                392, 392, 349, 349, 330, 330, 294,
                262, 262, 392, 392, 440, 440, 392,
                349, 349, 330, 330, 294, 294, 262):
        if f < 300:
            pixels.fill((150, 150, 255))
        elif f < 400:
            pixels.fill((255, 0, 255))
        else:
            pixels.fill((0, 0, 255))
        simpleio.tone(board.A2, f, 0.4)  # on for 1/4 second
        pixels.fill((0, 0, 0))
        time.sleep(0.05)  # pause between notes
    time.sleep(0.5)
If you’ve made it this far, try adding code to make it touch activated (hint: use the touch from last week.)
Next up, a big upgrade!
