Using CircuitPython to code a Gemma M0
You’ve sewed up your first circuit and you have a NeoPixel flashing colors, but you may be wondering, how does it know what colors to be? The answer is in the GEMMA itself. Today we’re going to look at the code, which is in a language called CircuitPython. That link will take you to the instructions for how to download and install the program on the GEMMA – yours is already running, but you may need that information another time.
What you do need, however, is a text editor that will allow you to easily work with CircuitPython code. We’re going to use Mu. Follow these directions on the Adafruit website to download and install Mu, if you do not already have it.
Unplug the GEMMA battery pack (if it is plugged in) use your USB cable to plug the GEMMA into your computer. If it’s your first time plugging this device in you may get a little dialog box (popup box) asking if you want the accessory to connect. Allow it. The GEMMA will now appear on your computer as a connected storage device called CIRCUITPY- so look for it wherever USB drives or the like usually show up. If you open it, you’ll see the following:

The second file, called code.py, contains all of the code that your device uses to run. This is the file we’ll be editing today.
Open Mu, and it should detect the GEMMA and load code.py immediately. If not, click the image at the top that says LOAD and navigate to the code.py file on the CIRCUITPY drive and open it. Once it’s open, you should see this:

Let’s take a moment to see what’s going on here. CircuitPython code has three basic areas – I call them references, setup and loop. The references come first and almost always either start with or include the word import. The word import shows up in green in the text editor because its a specific command- in this case, it means we are importing (or referencing) another code base or library. We’ll talk a lot more about that later.
The next section, setup, is where you find all of the various pieces of information we give the board so that it is ready to run code. This includes telling the board what pins/pads to use, what data to expect, creating variables and functions, and much more. This code runs just once when the board starts up.
The last section is the loop. This is the code that runs over and over again. In CircuitPython, it always starts with the phrase “while True.” For our purposes, in this class, remember that everything that is written under the while True loop is part of it. And also remember, like the great ring of power, there can be only one loop, and thus, only one while True.
Back to our code. We’re importing three libraries:
import time
import board
import neopixel
Time is a library that defines time (woah), specifically, lets the board know how to measure things like seconds and milliseconds. Board is the library that allows us to access all of the built-in information for our particular microcontroller board. And neopixel is the library for working with, you guessed it, NeoPixels.
Now let’s look at the setup section. It begins with two variables:
pixel_pin = board.A0
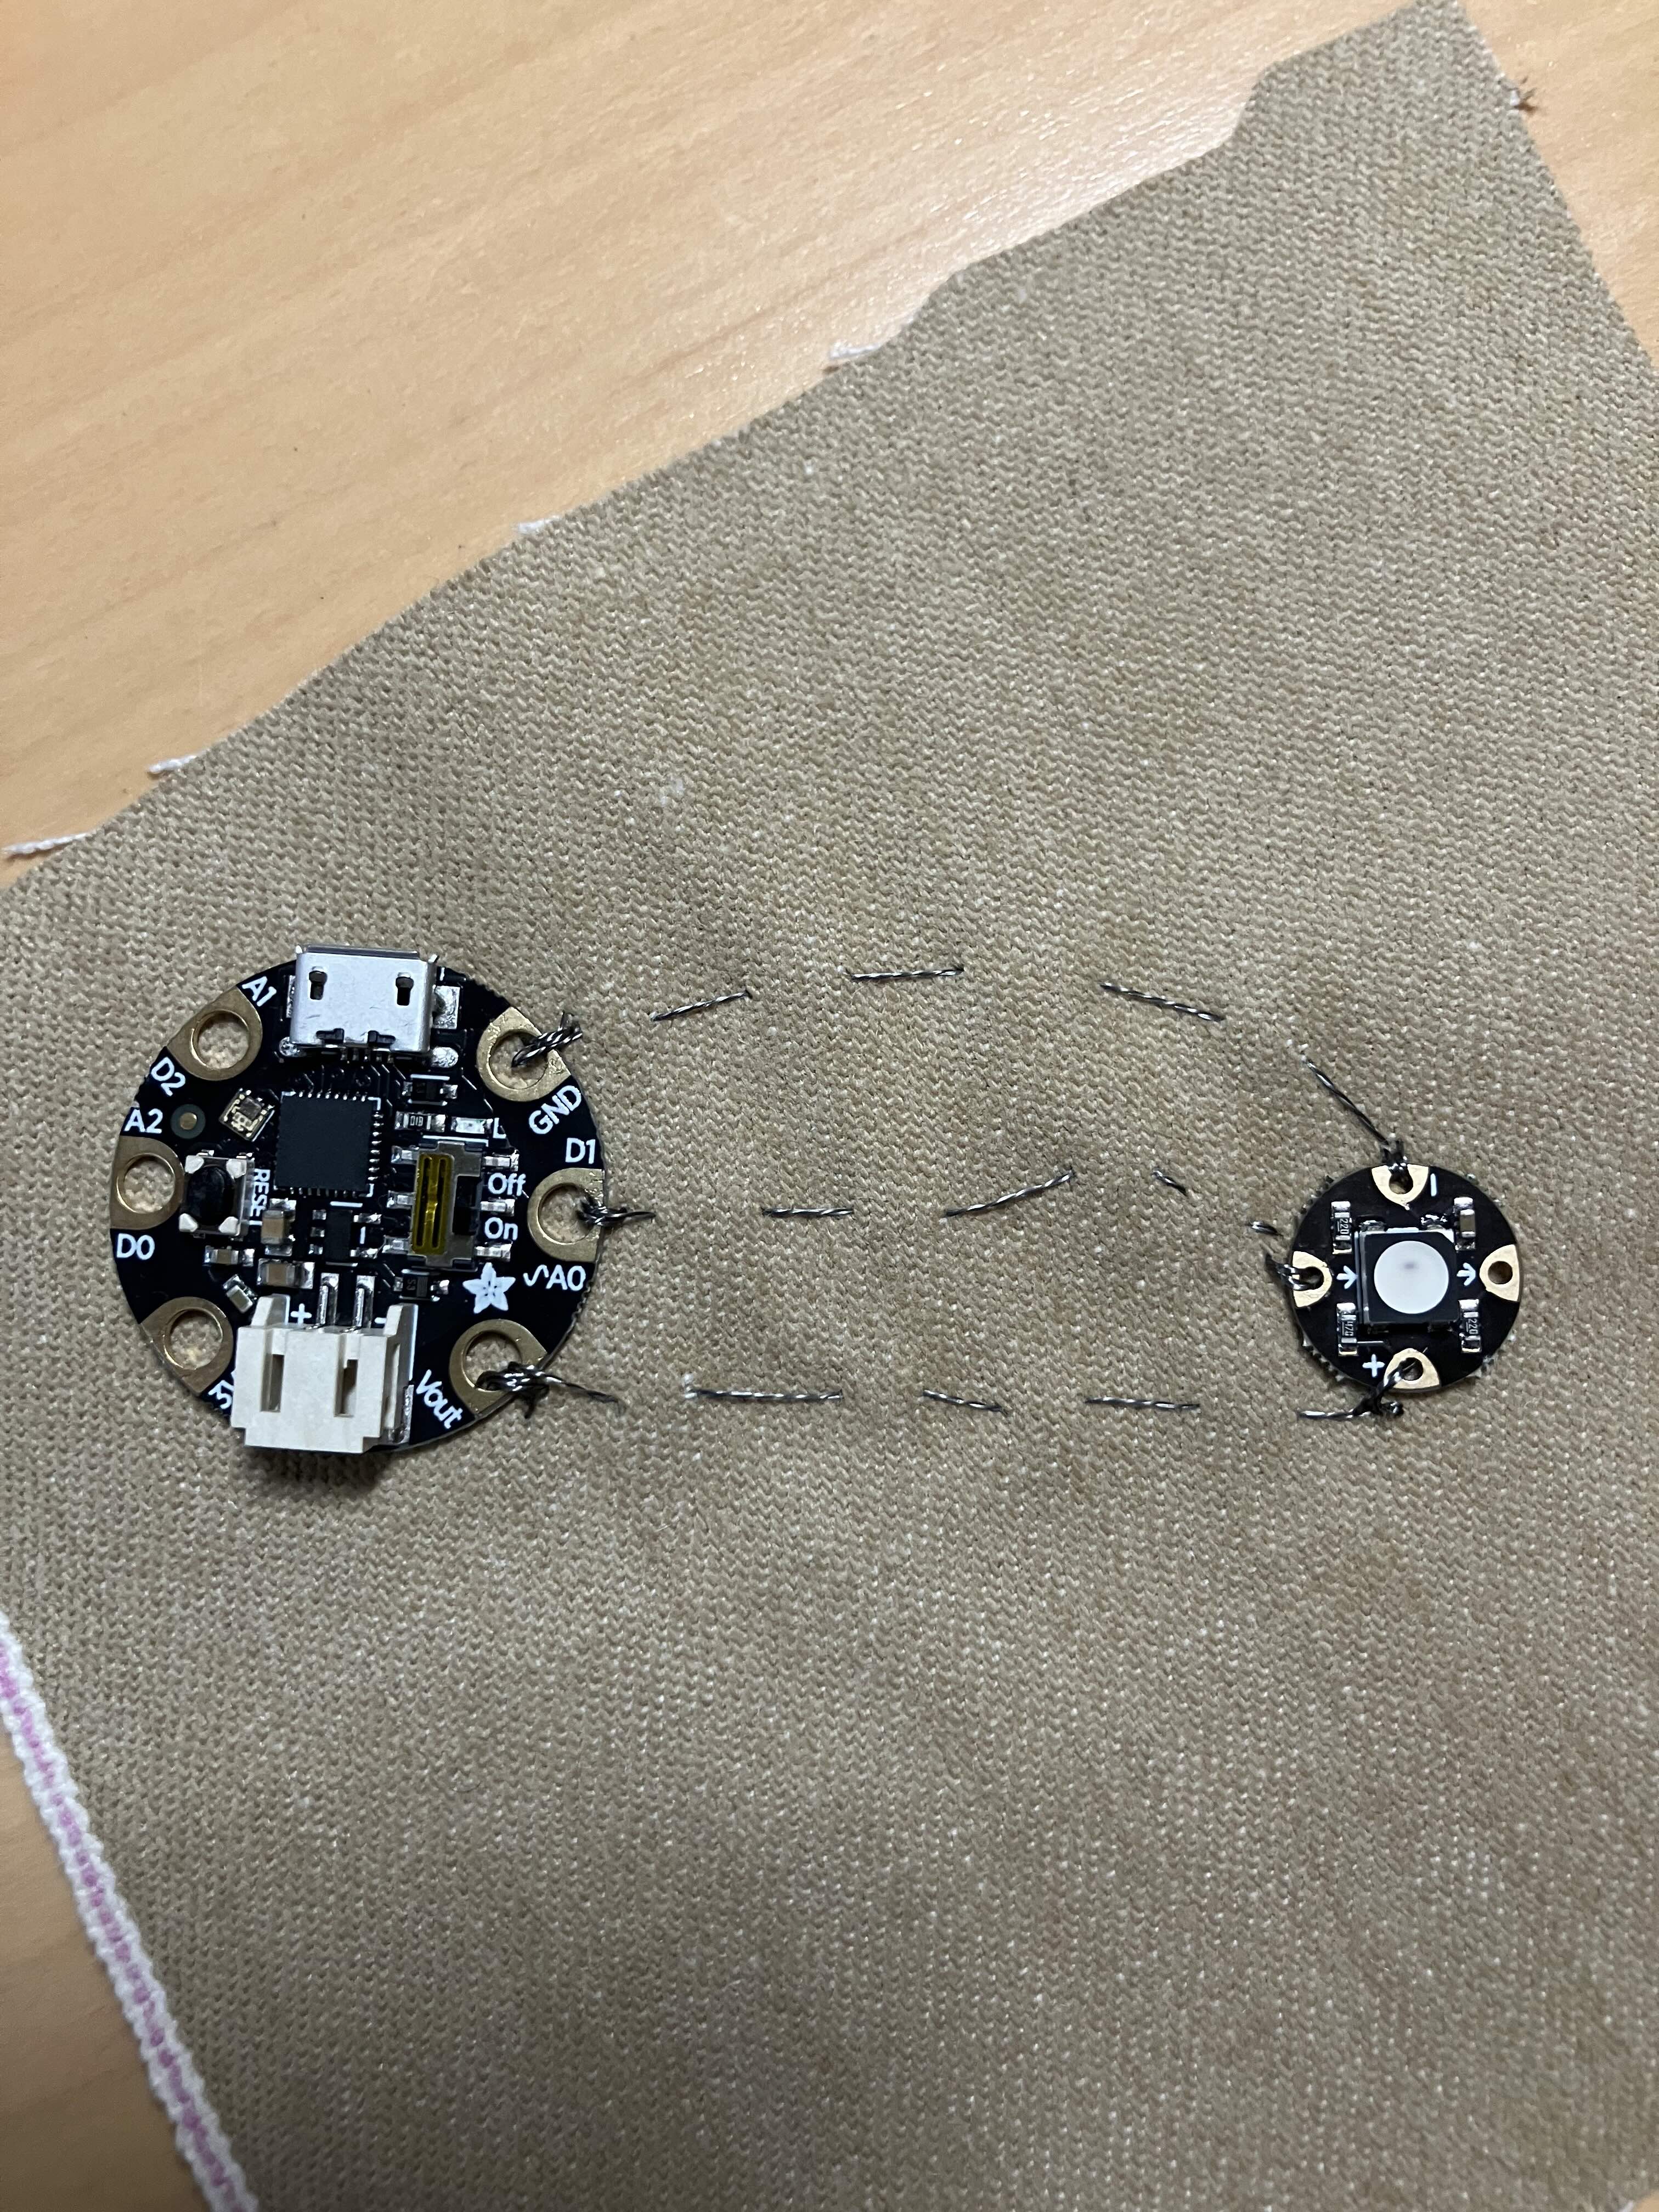
num_pixels = 1The left side of these are the variable names, and they are somewhat arbitrary in that, unlike some of the other sections of the code, they are not referencing libraries or other code, but have been created just for this particular program. That said, a good variable name should make clear what it is for, because the point of computer code is to be read by humans, and you want other people (including your future self) to know what you’re up to, so use sensible variable names. Here, we’ve got pixel_pin which is what we are naming the pin (or pad) on the board where the NeoPixels are attached, and num_pixels, which is the number of NeoPixels attached to that pin. And, lo, if you look at what comes after the equals sign for each variable, you can see that it matches our physical circuit setup. A photo for reference:
A note here: anyone who completed the bonus homework last week may, at this point, say – but wait, I’ve got two pixels on my fabric. And so I say to you- go ahead and change that number to 2, like so:
num_pixels = 2Click SAVE and boom.
Ok, back to the regular program: most of us have got just the 1 NeoPixel (that’s the smaller board, on the right), so the variable num_pixel is set to 1. Either way, that first pixel is attached to the board using port A0- follow the middle thread in the picture to verify that. (A0 is also called D1, but don’t worry about that right now). This middle thread is our data thread, it’s how the GEMMA sends info to the NeoPixel. The next line of code in the setup is, in fact, creating that pathway:
pixels = neopixel.NeoPixel(pixel_pin, num_pixels, brightness=0.3)It’s telling the GEMMA that we’ve got a strip of NeoPixels attached to a particular pin (pixel_pin, which we already set to A0), that there is a set number of them (num_pixels, which we set to 1 or 2), and that we should light them up with a medium brightness (brightness=0.3). This last part, the brightness, is optional, but NeoPixels can be REAL bright so we keep them muted.
Now, technically, we didn’t need to make those first two variables – the whole thing could have been written out like this:
pixels = neopixel.NeoPixel(board.A0, 1, brightness=0.3)Separating out the pixel pin and the number of pixels in the strip is a convention that makes it easier to understand.
But what is this neopixel.NeoPixel() business? That’s a function, and it’s not arbitrary, because it’s not one we wrote just for this program. We pulled it in with the NeoPixel library. Functions generally have parentheses, and these contain all of the values that the function needs to run – in this case, the function we’re calling creates a NeoPixel strip, and it requires two values: a pin for the strip and the number of pixels on the strip.
But how could you possible know that if I didn’t tell you?? As an open-source language, CircuitPython has documentation about all of its libraries, and you can consult the docs for NeoPixel to understand all of how the function works.
But for now, just know that it’s true.
The final section of the setup may be the most familiar to you, even if you have never coded before. As a hint, this is a section that defines colors for our little LED:
RED = (255, 0, 0)
YELLOW = (255, 255, 0)
GREEN = (0, 255, 0)
CYAN = (0, 255, 255)
BLUE = (0, 0, 255)
MAGENTA = (255, 0, 255)
Those are the six standard RGB LED colors : our primary Red, Green, and Blue and secondary Yellow, Cyan, and Magenta, with their corresponding RGB values (remember from last week that an RGB LED is just three LEDS, Red, Blue, and Green, each controlled individually). The values for each light can range from 0-255, but right now, we’re just using the highest and lowest, so 255 means that light is on and 0 means it is off. The RGB value for Red is, unsurprisingly, Red = 255, Green = 0, and Blue = 0. You can go down the line to see how the others work.
These variables, like the first two we saw, are not necessary for the code to work, but they make the final result more readable. Speaking of, let’s get to it. Your last bit of code, your loop, your one true while True, reads thus:
while True:
    pixels.fill(RED)
    time.sleep(1)
    pixels.fill(YELLOW)
    time.sleep(1)
    pixels.fill(GREEN)
    time.sleep(1)
    pixels.fill(CYAN)
    time.sleep(1)
    pixels.fill(BLUE)
    time.sleep(1)
    pixels.fill(MAGENTA)
    time.sleep(1)
What we have here is a repeating pattern of two functions: pixels.fill() and time.sleep(). Both of these variables came from libraries – pixels.fill came from the NeoPixel library (technically the first part of, pixels, is a variable we set but lets not get complicated), and time.sleep() came from the time library. And in each of the functions, you can see we passed a value – to pixels.fill, we passed the variable name corresponding to the RGB color value we wanted to light up, and to time.sleep() we passed the number of seconds we wanted it to run. In more human terms, this code says:
Light the NeoPixel Strip Red
Wait one second
Light the NeoPixel Strip Yellow
Wait one second
Light the NeoPixel Strip Green
Wait one second
Light the NeoPixel Strip Cyan
Wait one second
Light the NeoPixel Strip Blue
Wait one second
Light the NeoPixel Strip Magenta
Wait one second
And then it starts over from the beginning. Lo and behold, that is the very thing your GEMMA is telling the NeoPixel to do!
[At this point, you may be asking – what happened to the third library? We used time.sleep from the time library and pixels.fill from the neopixel library, what about the board library? Well, we used it way up at the top- that’s where board.A0 came from. :D]
Now let’s play around with your code. The colors we’re displaying are arbitrary, so you can add a few of your own by adding new values to the setup section. Use an online RGB color picker to find some new values. I’m going to put in some pastels:
RED = (255, 0, 0)
YELLOW = (255, 255, 0)
GREEN = (0, 255, 0)
CYAN = (0, 255, 255)
BLUE = (0, 0, 255)
MAGENTA = (255, 0, 255)
PINK = (255, 150, 255)
LAVENDER = (150, 150, 255)
AQUA = (150, 255, 255)
I added them to the end of the already existing list. Now, I’ll modify the code to include our new colors instead:
while True:
    pixels.fill(PINK)
    time.sleep(1)
    pixels.fill(LAVENDER)
    time.sleep(1)
    pixels.fill(AQUA)
    time.sleep(1)
Now, we save it! Click the button that says SAVE at the top of the screen to save it and run it on your GEMMA.
Fun, right? Ok, one last twist. You also have the ability to control when the lights go on and off- because the GEMMA doesn’t just do OUTPUT (like sending data to the NeoPixel strip), it also takes INPUT. For this, we’ll need to add a new library to our references– the touchio (or touch input/output) library, and we’re going to use another one of our pins, the A2 pin, as a touchpad, so we’ll put a line in the setup area, then finally we’ll change our loop to make our code respond to touch. Here’s the full final code up front, and then I’ll go through it line by line. You can just cut and paste this or you can follow along:
import time
import board
import neopixel
import touchio

pixel_pin = board.A0
num_pixels = 1

pixels = neopixel.NeoPixel(pixel_pin, num_pixels, brightness=0.3)
touch = touchio.TouchIn(board.A2)

RED = (255, 0, 0)
YELLOW = (255, 255, 0)
GREEN = (0, 255, 0)
CYAN = (0, 255, 255)
BLUE = (0, 0, 255)
MAGENTA = (255, 0, 255)
PINK = (255, 150, 255)
LAVENDER = (150, 150, 255)
AQUA = (150, 255, 255)

while True:
    if touch.value:
        pixels.fill(LAVENDER)
        time.sleep(.1)
    else:
        pixels.fill((0, 0, 0))
        time.sleep(.1)
At the top, we add
import touchioto the list of references. Then, we add the touchpad instance to the setup:
touch = touchio.TouchIn(board.A2)Similar to creating the neopixel strip called pixels, this creates a touchpad called touch, telling the GEMMA to create a pathway for input via capacitive touch on pin A2.
The final bit is changing the while True loop. This is a bit more complex, but what we are doing is making a simple conditional. If the pad is touched, light it up lavender, but if not, turn it off! I also shorten the sleep time to one tenth of a second so that the reaction time is better:
while True:
    if touch.value:
        pixels.fill(LAVENDER)
        time.sleep(.1)
    else:
        pixels.fill((0, 0, 0))
        time.sleep(.1)
I’ve thrown a potential curveball in here – up until now, we’ve used variable names for colors. In this last section, though, I call pixels.fill and just give it an RGB value straight – in this case, black, or 0, 0, 0. You could, in fact, always do this, and forgo the color names entirely.
Put the code in and press SAVE to run it, then touch your finger to the A2 pad to activate the light. Whee!
Ok, so last last stretch for anyone who has made it this far. Your GEMMA has three I/O (input/output) pins on it – A0, A1 and A2, so we can actually add a second touch button using the remaining unused pin – A1. I’m just going to dump the code for it here, and you can try and work it out yourself.
import time
import board
import neopixel
import touchio

pixel_pin = board.A0
num_pixels = 1

pixels = neopixel.NeoPixel(pixel_pin, num_pixels, brightness=0.3)
touch = touchio.TouchIn(board.A2)
touch2 = touchio.TouchIn(board.A1)

RED = (255, 0, 0)
YELLOW = (255, 255, 0)
GREEN = (0, 255, 0)
CYAN = (0, 255, 255)
BLUE = (0, 0, 255)
MAGENTA = (255, 0, 255)
PINK = (255, 150, 255)
LAVENDER = (150, 150, 255)
AQUA = (150, 255, 255)

while True:
    if touch.value:
        pixels.fill(LAVENDER)
        time.sleep(.1)
    elif touch2.value:
        pixels.fill(GREEN)
        time.sleep(.1)
    else:
        pixels.fill((0, 0, 0))
        time.sleep(.1)
Next up, playing with sound.
